Hi there! Welcome to my GIRLY SPAZMS. I am most productive when I'm about to lose it. Easily distracted and daydreaming, I fight my way through the day just so I have moments like these. Please visit often as I am updating and adding new things when time allows . Feel free to drop me a line. Say hi, leave comments, suggestions, feedback & your experiences . Thanks for visiting my crafty blog & be sure to check out my etsy shop too.

10/7/12

Simple. Quick. How to. Stamp on washi!!!

This was actually done in less than five minutes before I headed to the gym for my morning workout.

Typing this out is probably taking a lot more effort, but the results were so awesome I had to share...

Things you'll need:

  • Your washi tape
  • Acetate better known as transparency sheets (great deals on eBay btw)
  • Your stamp
  • Your ink
The set up
  1. Lay out your tape strips either vertical or horizontal, whatever you prefer on your transparency. (I tried reg paper but it tore up the paper pretty good)
  2. Ink your stamp
  3. Press firmly but not too much or you'll smear your design.
  4. Hold down sheet of transparency as you lift stamp directly up & off.
  5. Let ink dry
  6. When dry move strips of washi to clean transparency.
Silver spiderwebs on plain back washi

Sit back. Admire & use...


10/2/12

Cardboard letter adventures...


I'm back to revamping my craft room again.
With the never ending addition of new supplies, there's a constant need for storage space too. I'm preparing to take on my first sanding & repainting of this awesome piece of antique furniture I came across at a garage sale over the summer. It's totally cute & adorable. Just the prefect thing I've been looking for. I need to go to Restoration Hardware to get new pieces for it, and I also need to get some power tools so that I can do this job right the first time.
I've read a ton of "how to"-s on-line, and as much as I think I'm ready, I'm nervous as all hell.
So in the meantime while I muster up the courage to finally take on this project, I continue to organize, and decorate around the idea of having this finished piece one day in place. 


I wanted something crafty as wall decor... So..after much deliberation, and a few inspiration from facebook friends & pinterest pins.

This idea was born. At first, I was going to buy the 8 inch letters from Hobby Lobby. Which by the way, finally opened up locally in Morgan Hill, (http://www.yelp.com/biz/hobby-lobby-morgan-hill)  that turned out to be a fun adventure of strong margaritas and craft shopping. 
Instead, I decided to tackle it on, and make my own... 
I had a few too many post office boxes laying around the house due to a post office glitch that sent me a huge pile of supplies.


Tony opened the door & saw this staring back at him. Oops! 
So first things first, my trusty silhouette did the easy part & by Sunday morning at 6am, my letters were cut... 

Laid it across my kitchen floor.

Ginger: Didn't mind me, just passing through.
Me: GINGER! Move it! 

Maylin: Oh mom's doing something, let me get in the way.
Me: You too? Ugh. 
Maylin: So, mom... I was thinking... Oh, you're busy.
Me: MOVE IT. 

Maylin: Oh, there's something here... 


Maylin: Move?..but.. I have to rest.. 

Here's a C! 
All I did was trace my letters on to cardboard. (twice)
Cut them out.
Cut 2 Inch strips & taped them together to make them 3D.


Finished the first... Now he's waiting for his friends to join...
I'm still planning a couple more steps before they are officially done. 
There is still the decoupage with newspaper step. 
Then spray painting with white.
Then I'm going to cover them in my beautiful washi tapes.
I'm totally crossing my fingers & hoping that this turns out the way I am envisioning in my head. 

I'm hoping to have this done & up by mid-October.
Do you think I can do it? 
I'll update soon... 


shen


9/26/12

QUICK Washi tape holder tutorial...

We collected our supplies at Michaels & Lowes …

  • 1-  blank wooden sign (normally used for a decorative wall hanging)
Pick whatever shape & size you prefer,  but make sure it’s a sturdy thick piece because this will be your base to your washi tape holder and you don’t want it toppling over.
  • 1 – 1 inch thick dowel. I’m assuming you’re making a 6 stack one like mine in the picture so with that said, I got a 36” long dowel.
  •  A drill
  • A 1 inch hole saw
  • Wood glue
  • A hack saw
  • Paint if you prefer.
  • Felt (only if you want a  full felt bottom)  OR You could put little self-adhesive rubber/felt circles/ squares to act as feet on the bottom too. This will help protect the surface you place your washi tape display.  
I used a colored stain from Lowes because I wanted the wood grain to show through a lot more than seeing that layer of paint. I wasn’t very happy with the results, so I think if I make another wood project like this, I’ll be buying the other teal colored wood stain or maybe experiment with some food coloring & then seal it with acrylic after.  I’ll be sure to update if I try this out.

We finished this project in one evening. It took me a couple days to finish the painting portion. I put about 3 coats on & then a clear acrylic after. The only reason I did so many coats is just because it wasn't turning out like I was hoping. 


Determine where you would like your poles to go & mark center.
Tony used my actual washi tapes to figure out  a "nice" spacing to avoid an overcrowding look.
Drill down to 1/2 an inch or 3/4. Try not to drill straight through the base.  

Cut the dowel into six  --6 inch segments. 
I got a little impatient & tried out the wood stain while the dowels were drying. 

Use wood glue & place the dowels into the drilled holes.

Paint. Dry. Use.


Unfortunately, I've already ran out of room & have had to resort to a cheapy container from Daiso, however, if you can practice a little more self control unlike me. This holder should suffice. 


But I still have this one & love love love it! 

Let me know if you have any questions.

shen

9/25/12

FIRST GIVEAWAYS. FACEBOOK. HALLOWEEN. WASHI TAPE.


Wow! It’s been such a long time since my last entry… So I figured I’d do a quick update.
The etsy shop has been on a hiatus, as I finished up a big project.  Finally done! My little sister is turning 18 & she wanted these cute little exploding box invitations. She didn't even want to look at any other option after she saw these.
After researching and help from the BFF these little suckers came to life, piece by agonizing piece. 


little paper cakes inside "exploding boxes"

Invites all boxed up & ready to go. Thank goodness I have a huge dining table. 

I’ve been able to squeeze in little projects here and there in between doing this big project. The etsy shop had a "soft" reopening as I started to post up new items. 

I was able to do a first giveaway on the facebook page, plus a few “appreciation” gift bags for people who were actively sharing my page with their friends. That was a lot of fun! 

I did a type of “I Spy” photo game and the first two to respond won some fun rainbow toe socks. 
Quick back story: I needed measurement for the perfect fit. Requested customer send me pictures and she did this... Do you see her cute little toes? Can you see where/ what she's standing on????
 Had me laughing so hard! 

Total coincidence.. She wore rainbow socks to show me the after... I had already gotten rainbow socks for the winners a few days before. What can I say... Great minds think a like! 


If you want to keep updated please “like” the NEW facebook page www.facebook.com/girlyspazms I'm planning on having a new giveaway again soon! 

The old one was just a "like page" and it was ridiculous to get to... it was like facebook.com/somebunchofgibberish&numbersyadayada....so this new page is a lot more simple... www.facebook.com/girlyspazms 


I've picked up two new obsessions.... WASHI TAPE!!!! and the hubby made me a nice organizer for it. I'll have to put up a short fast tutorial for it when I've got a minute. I love it! Only problem is I already ran out of room, and had to resort to a container from Daiso.

This is the current stash as of today... 9-25-12.. I have 7 rolls on their way to me..
Shut up don't judge me! okay judge me. I don't care. ;D
I LOVE WASHI TAPE!!!!!


 The other obsession... CLEAR STAMPS. You know the kind that you can keep stored away in neat little pages, and then when needed mount them on an acrylic block... Yeah. A little obsessed with those too.


Just a quick view of some sets of clear stamps I have.


I have so many ideas that I've written down. I started making cards which was one of the things I really wanted to finally dive into. 


Instagram shot of my lil halloween lunch cards I made.
All packaged w/ envelopes made to size. 


And finally October is just around the corner, which means I can break out the halloween decor again!!! yay!!!!!!

Halloween my most favorite holiday aside from Valentine's is coming again! I made the mistake of going on a "quick" Michael's run when they first put out the new things for Halloween, and boy! was my head spinning. "I JUST CAME IN TO GET SPRAY GLUE!!!! DAMN YOU MICHAELS!!!!"    


If you don't remember last years video... Here you go! 


And last to share.... Family art project coming soon..... Dia de los muertos sugar skull decorating.. 


Thanks for reading! What have you been up to?


shen

8/13/12

you can't catch me...

Sharing another part of my life.....

So aside from my sedentary life of crafting, gluing, pasting and sewing, I’ve also picked up another new “like”…. not love yet… definitely not love… (more like a like- hate relationship)Running…Yes, running… That’s what I’ve been working on for the two months. I’ve never been a runner. Sure, I can be on an elliptical for a couple hours with no problem. I can run on the sand, barefoot at the beach effortlessly. Thanks to my calves…But man oh man… I have horribly flat feet. No arches at all. So flat that I am embarrassed when I leave my footprints on the ground by the swimming pool, or in the sand. I hated running. Even in my more active younger days as a volleyball player, and we were having practice, the running portion sucked. So when I started running recently, it was hard. My ankles were hurting, and now my knee hurts, but I’m keeping at it. I run in intervals. I need to slow down and catch my breath. I run with Ginger, and she hates me after. But when all is said & done, and I’ve finally caught my breath & have managed to not pass out, it does feel good. 
Getting accustomed to the treadmill was the hardest part, and I think I’ve gotten that part down now. I still think I stomp relatively loud, but eh… I turn on my music on louder, and I hope that I’m not irritating anyone else at the gym around me.
I bought Sketchers Go Run shoes that claim to be close to running barefoot. Those weird frog looking ones just weren’t as appealing to me. I like my shoes. They’re comfy on my Fred Flintstone feet. They are light, and if I really wanted to I could wear them with no socks. The only regret that I have is that I should have gotten the bright orange ones instead of the less flashy navy blue with lime green accents. Still…. I like them. Whether or not they have encouraged me to run and keep on running, I can’t determine. Why this push to run? Well, the hubby & I, along with a couple of other friends, have signed up for the local “Color Me Rad” 5K run this September, so being able to run (even a portion of it) would make me feel good. 
 I asked the sales lady at GNC if it was normal to feel like you were dying after you slow down from a run. She told me yes, and proceeded to tell me that she could never run. That she sees people all the time and wishes she could, but can’t. So it made me feel better to know I can actually do it. I just have to keep at it. So even though I have to argue with myself to push the button to a higher speed on the treadmill I’m surprising myself every day as I reach personal goals that I have set. As I said before… I like running… LIKE….

I'm not one to mention my weight loss & weight gain, but I'm pretty happy with the side effects of running as well..
Now that I've gotten a lot more comfortable though... Why does the treadmill shut off when I run at 7.5mph? It's getting a little frustrating, but maybe it's saving me from the embarrassment of falling off. 

And with that said, here's a video of one of my favorite songs... 
excuse the quality.. it's bad... 


Just a quick update...
We did it! Our first 5k before and after pics at Color Me Rad San Jose 2012...


It was so much fun! I feel so accomplished... Now on to the next one. The Firefly run September 22. 


shen


7/24/12

List! Do! Done!


Aside from my own personal use, I’ve been adding a lot more things into the etsy shop.
It’s fun, but I’m taking advantage of the time I have before it comes few and far between.
I feel the need to list things. It makes me feel like listing things out make me obligated to complete these things.
I love making lists actually. I have a “want list” which I list everything I want to purchase (latest purchase was a glass bowl for my kitchenaid mixer. It’s so purdy!!!), a  daily to-do list, a “complete when you can To-Do list” and of course my crafty ideas & my “crafty to-do” lists. And still I find myself saying, “I’m bored! There’s nothing to do!!!” Silly me.
Lists, in my eyes, are fantastically awesome. They are useful.. You can’t convince me otherwise. When things need to get done.. List, do, & check off.. Simple & to the point.
So I will share this current Crafty To Do lists with you…
Crafty To Do list for home:
·         Make 2 more accent pillows for couch
·         Make cement garden stones with the family
·         Start on guest bathroom word signs “sun, shells, sand” or “sun, sea, sand” <
·         Finish Anthony’s comic book letters for shelf display
·         Get shelves from ikea for Anthony’s room
·         Finish subway art for kiddos’ floor
·         Finish last two garden markers
·         Heart string wall décor


Crafty To Do list for the etsy shop/ girly spazms :

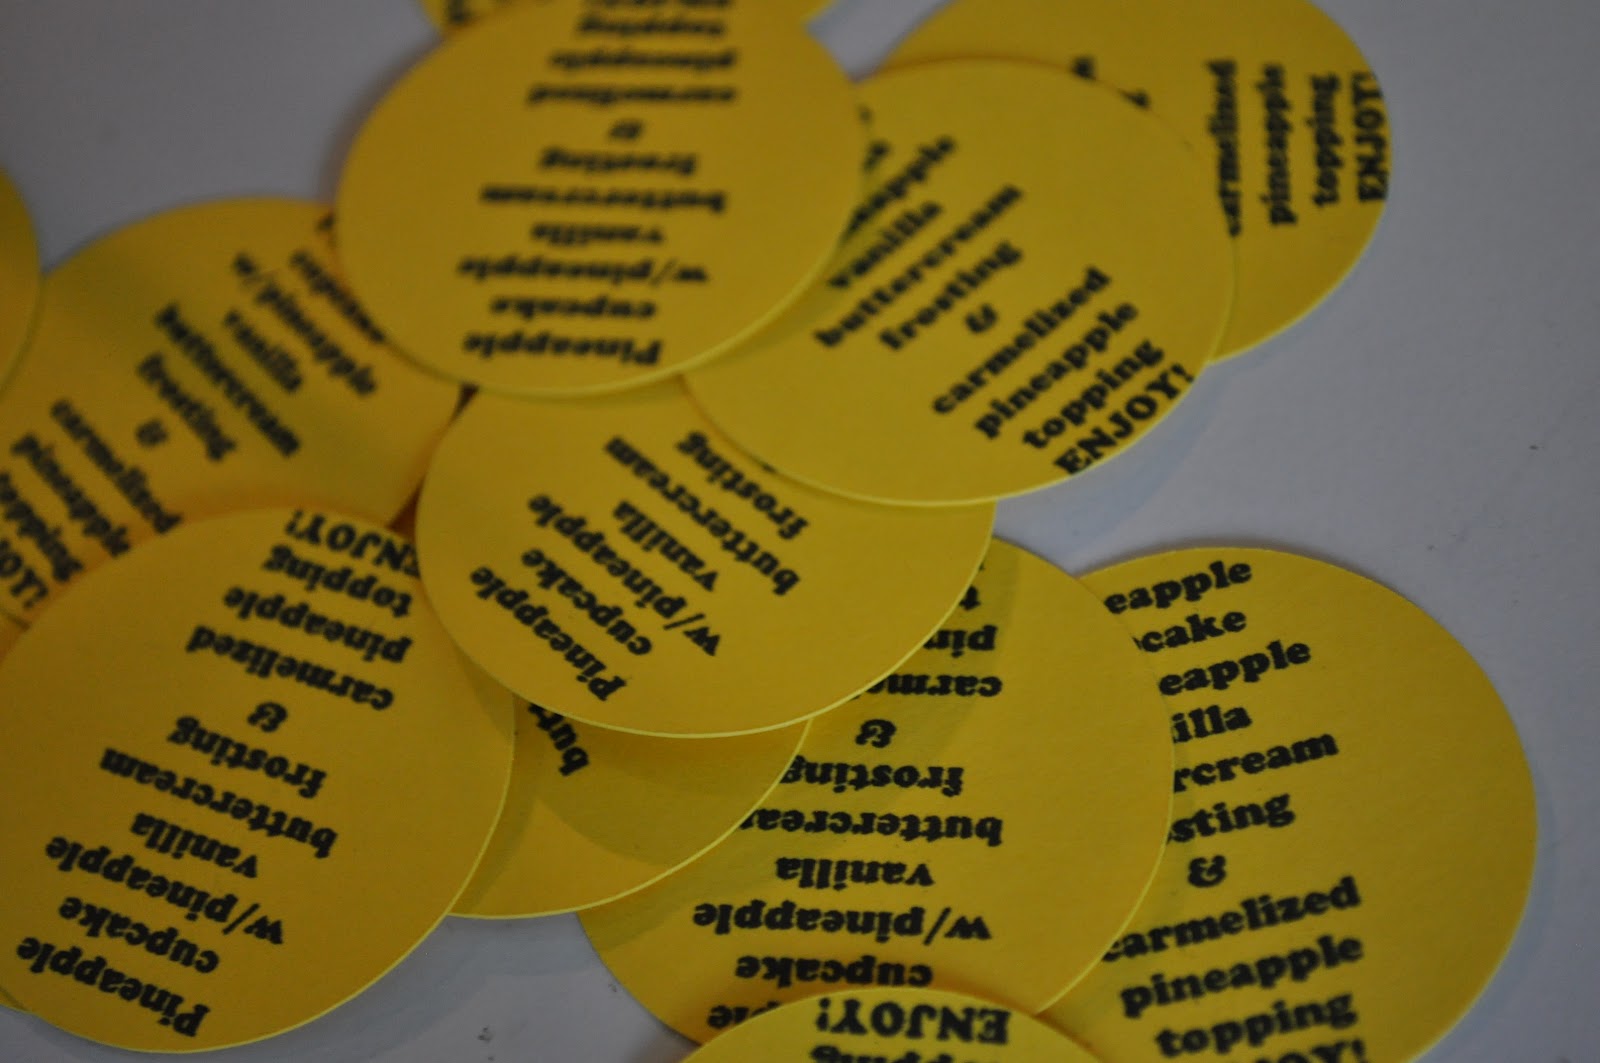
·         Finish cutting, assembling, and packaging misc. cupcake toppers (3 designs in the queue)
·         Finish designing new kraft labels when the labels come in
·         Explore possibility of new business card designs
·         Finish sriracha dog & cat plush toys and  make a few more. (about 10- 15 total)
·         Make bento box napkin/lunchbox
·         Add Sriracha apron & hoodie to the shop
·         Finish Ginger’s note cards
·         Work on a gocco print design ( starfish print & possible sushi design)


And that about sums it up for the next couple of weeks… Will I get it all done?
We shall see…
You know what I need.. A house with a pool… That way I can sit in the pool  & hang over the side and craft…
Yup, I’m convinced that’s what I need. Especially during the nice summer days. 


shen


7/12/12

A short blurp of silk-screening advice..


Wow! We’re already in the month of July?!?

How did that happen so fast? In a little more than a month the kiddos will be back in school again, and then we start the cycle all over again…
It’s been a very eventful summer thus far. It’s just too bad it’s passing by so fast. We’ve already had our share in sunburns and soon those fun days will be over.
In the meantime, we’ve been keeping busy with the summer plans & of course, our crafting on the side. It’s really nice to schedule a day just for crafting, but it’s hard when it’s so beautiful out and all I want to do is play.
So far, I’ve learned how to use liquid emulsion with the yudu & yudu products. I’d make a video of it but I think there are plenty of tutorials online that are pretty self-explanatory. I would only make a tutorial if I could add more valuable information. The only advice I have is BE PATIENT. Silkscreening takes time & patience. You aren’t going to learn how to do it overnight. It’s a “practice makes perfect” kinda thing. Even after 3 years of experience, I still screw up & sometimes I just don’t want to bother with it at all. We have a love hate relationship, and although I keep insisting that I WILL do this.. It sneaks up on me and says, "oh hell no bitch, not today" & there I am with a sad face and another ruined screen to try again....  =/  Although the yudu commercials make it looks so easy, trust me when I say it’s not. This is where the internet comes into play, check out “hacks of the yudu”, discussion boards, and tutorials on liquid emulsion, etc.. etc… It’ll all be worth it when you use your money wisely instead of blowing it on brand name products that don’t work properly. I’ll admit, the yudu is convenient because it puts everything in one spot, but you don’t necessarily need to have that to make a simple screen print. Depending on your design sometimes you just need contact paper and your design.. I’ve done that too!  My love pillow.... &  My Aloha pillow for example! 


If you decide to try out liquid emulsion I absolutely encourage it.  You can buy a cheap $20-25 starter kit, and advance to the huge jug once you’ve mastered it…  Read the little pamphlet that comes in this kit. It has a lot of valuable information which I wish I could have had when I first started silkscreening…
I am proud to say I can use the liquid now, and I can’t wait to make more shirts… The sriracha shirt is still in demand, and so that’s a good thing for me.
At this current time, I’m testing out a “brine” technique to make the shirts I print on softer, and more vintage-y feeling. I’ll know by the end of this week, if this is a favorable method I’d like to continue.  You think my customers will appreciate this new method too? I hope so…
This weekend is the Obon Festival in SJ’s Japantown. I’ve been taking the kiddos to practice at the buddist temple, and so we’re excited to take part in it this year. Usually we’re just spectators. Sam will be dressing up in a yukata outfit which with some local expertise, we were able to put together. We managed to avoid costly purchases, and I made a few articles of clothing for her outfit.  We’re doing a dress up rehearsal tonight, just to make sure we got everything.
Other than that, more sunburn is in store for tomorrow. I took the days off because we had originally planned on going to SD for comicon.. Didn’t happen this year, but next year for sure. We’re planning on staying there for a few days..

I’ll end for now. Hope everyone is having an amazing summer.
Drink lots of water, and have an amazing time with your friends & family!

Bye for now!


shen


6/11/12

Admit one..

Pretty simple..


Shadow box from local craft store.. 


Designed a scrapbook back ground. I love the ticket shapes...
I was tempted to put a mini 3D popcorn box in there, but opted for the non-cheesy. I wanted to avoid the rolling eyes.. 


ADMIT ONE..


Saw a 3" slot at the top for easy "deposits"...


DONE! 


I made this for my teenage kiddo... She likes to keep all her ticket stubs...


shen


6/10/12

Graduations are coming!!!

I'm so excited a couple important graduations are coming. Both lil sisters, one from junior high, and the other one from high school. It's an exciting way to start another fun summer.
I made ribbon leis for them & can't wait to give it to them...
Really simple & you can adjust your lei to be as fluffy & thick or thin as you want.
Here's how to make this one ...


For this particular design I did the following:
  • 10 yards of pink...then a "flower"...
  • 1 yard of green
  • 3 yards of white
  • 1 yard of green
  • 20 yards of pink then a "flower" again..
  • 1 yard of green
  • 3 yards of white
  • 1 yard of green
  • 30 yards of pink then another "flower" again...
  • 1 yard of green
  • 3 yards of white
  • 1 yard of green
  • 20 yards of pink then last "flower"...
  • 1 yard of green
  • 3 yards of white
  • 1 yard of green
  • 10 yards of pink
Yes, that's a whole lot of ribbon. One-hundred & ten to be exact, but trust me it's a beautiful keepsake to commemorate the occasion for any graduation, and with the variety of ribbon out there you could totally play with it and customize it for the recipient. You could even add plastic flowers to compliment the lei. 
To do this find 3-4-5 (depending on size) of the flower you want to include. Pull them off the stems & sew them into a small tight circle & string where you want it to go on your lei. 

OTHER MATERIALS YOU WILL NEED:
  • 3 strand nylon rope (found in most hardware stores)
  • a large sharp metal yarn needle
Close up of the ribbons I used. 

The pink & white ribbons measured 3/8 inch wide. 
The green w/ the cute loops measured 3/16 inch wide. 

Now once you've collected all your ribbon, you're going to take a pen and lightly mark your ribbon at 2 inch intervals. I suggest doing this as you complete your project. Sitting there and measuring out 110 yards all at once would have drove me insane. I also did not sit & make this lei in one day. It took me several days to complete. I found time to sit and do it while I watched tv, mainly shows or movies I've already seen so it didn't require my absolute attention. Thanks to this project I was reminded what great movies  Zorro & The Patriot are.

Now take your nylon rope & measure out 36 inches. Don't worry! It's not going to be this long. Its just enough for you to have extra to work with..
Tie a double knot at one end, and string the needle at the other.
And now you're ready to start the lei...

You are going to sew in & out of the ribbon at each 2 inch mark. IN one... OUT the next... IN again.. OUT again..

On the needle it should look like this...

If you move the ribbon down off the needle and onto the nylon rope it should look like this if you straightened out the ribbon...

Like this.

Continue to do this & 110 yards later, fluff your ribbon up, making sure it's all spread out evenly. Use someone's neck to determine a good length.. Ask permission first, of course!

Then double square knot while including the original knot you made at the start of the project. 


 Cut off the excess nylon rope.. and there you have it! A finish lei!


Let me know if you have any questions! 
Aloha & Congrats to all the 2012 graduates! From Preschool all the the way to Grad School & beyond! Way to go!!! We are all very proud of you & your accomplishments! YAY! FOR YOU!! 


shen


6/5/12

The Meow Store

I proudly announce the opening of my daughter's etsy shop!
Okay.. Okay... It's been open for awhile, but as you know I'm slow at blog entry updates.
She's currently working on her inventory of things, and will be adding more soon. Unlike what I did, I stocked up for my "GRAND OPENING". I'm so proud of her nonetheless. 
She's grown into such a wonderful and responsible young lady that how could I not allow her to broaden her talents.
She has been working on some cute Hello Kitty bow clips, and on graphics that represent her shop. She's great at photoshop. It blows my mind. 
Although I'm not one of those crazy moms where every time I open my mouth all I talk about is my child this, and my child that...Uh... There is more to me than just my children and my kiddos totally get that. This is a moment where I will boast proudly on my child's accomplishments. Thank you very much. 

Sam putting her bows on clips.

She even made her own display cards. Graphic & all. 
So come on by her shop & like it! She's an aspiring anime artist, whose goal is to have her own booth at Fanime (In San Jose) one day. 


Thanks for allowing me a moment to brag. Now back to the other stuff.


shen


5/30/12

End of the school year thank you treat...

It's hard to believe but the kiddos are all done with school already, and I think they had an amazing year of learning. Teachers can be so amazing at what they do and how they influence the children they have in their class.

Hopefully they like our lil gift of appreciation.

I needed something easy for the kids to carry around with them, pass them out to each of their teachers as they went from class to class, AND not worry about spillage. Then I saw a great suggestion on Pinterest. Clear party cups & cellophane wrap. I made it even easier on me, and found cellophane bags that the cups would fit in...


clear cups & cellophane baggies


I made pineapple cupcakes w/ vanilla pineapple buttercream frosting. Which I have to thank my BFF, Linda, for giving me a basic recipe during a state of panic. Panic? I had gone onto Martha Stewart website, and after reading the bad reviews of her recipes, had no idea what to do with myself.


I let them cool & popped them into the cups..


Then I frosted them...


I hope that I will be able to duplicate this recipe of frosting again.
If you look closely, you can see the little bits of pineapple in it.

This frosting came out amazing. I had to kind of wing it, at one point I was going to throw it all out, but I didn't give up, and the results were amazing!


Not done yet! I even caramelized some pineapple...


Surprisingly easy (for me at least)
Brown sugar, pineapple, stir till golden brown.. That's it!
Just a little dab..

Because I always like to know what I'm being offered, I made labels with my wonderful silhouette.... (My next tutorial will be how to do this. I'm hoping that I can convince other people to get the silhouette.)


Design..

Print...

Load silhouette & cut...
sprayed them w/ spray glue, popped them onto the bottom.

The kiddos helped get them into the bags..
made tags. design, print, cut... again

fabric ribbon.. It's just prettier..

Tie
Ready to go!


YAY! Let the summer fun begin!


shen